Posts

Dynamic data display Based on User Selection

Image
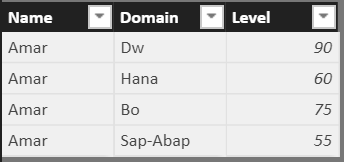
Description:  Sometimes we need to display the dynamic data based on Slicer Selection in Power-BI. Let me describe the scenario and the steps to achieve it. Step 1:    Source Data Step 2:   Create one calculated measure:   Step 3: Drag slicer from visualizations panel to Designer part. Step 4:  Drag ID column to slicer field so that the slicer will get impacted by ID column data. Step 5: Drag card visual from Visualization panel to Designer part.             Step 6:  D rag measure to the card visual field, then slicer will be impacted by Measure column. Step 7: Now go ahead and check the card visual, it will be work as per our requirement. Follow the below picture for easy recognition. Step 8: If you don’t select any slicer value then card visual will be shown as “ALL SELECTED” Thank you.

Changing the X and Y axis values based on Slicer Selections in Power-BI

Image
Description:         This blog consists of the dynamic change of X and Y chart values based on Slicer data Selection. Step 1: Source: Excel File Sheets Sheet 1: Sheet 2:    Sheet 3:     Sheet 4:           Sheet 5: Step: 2      As per our requirement, we need to create one calculate table and insert data based on variable values. Now go to modelling option and Click on New Table then Table will appear on Design Part .     Step 3:    Now we can create variables and assign particular source data as variable values. Step 4:     Table structure and data created based on the above variable values. Step 5:    Now we need to write one calculated measure in a calculated table for dynamic X&Y chart changes. Used DAX functions: 1. If   2. Hasonevalue   3. Switch   4. Calculate    5. Sum    6. Treatas Measure:     Measure = if(HASONEVALUE('Table'[Name]),               

How to show Rating Stars and Traffic Light Indicators in Power-BI

Image
Description:  In most of the scenarios we need to visualize the Data (Performances) with Rating Stars or Traffic light indicators.                     Following are the steps illustrating the performance indicators in Power-BI reports. Source:       Step 1:         As per the data our requirement, the stars in a new column based on the rating column. So we need to write a measure with Unichar codes. Please follow the below measure for stars rating. Measure:  Stars = REPT(UNICHAR(9733), AVERAGE('Sheet1'[Rating ]))      & REPT(UNICHAR(9734), 5-AVERAGE('Sheet1'[Rating ]))  Output:     Step 2:        Now we can write two more measure with unichar codes based on the same rating column. Measure 1:      Mensymbol = REPT (UNICHAR (128697), AVERAGE ('Sheet1'[Rating])) Output: Measure 2: Lights = REPT(UNICHAR(11044), AVERAGE('Sheet1'[Rating ])) Output:      

Hide /Unhide the Slicer Panel in Power-BI

Image
  Description:  In general Slicers are occupying most of the space in the report area. We can overcome this issue by using Slicer panel with Hide / Unhide features. Following are the steps to achieve it. Step 1:     Drag one text box to power desktop and write heading as per requirement.  Step 2:      Arrange require filters in the existing text box. Step 3:           Arrange left and right arrow buttons in the text box. Step 4:         Create two bookmarks with Require names. Step 5:     Apply Bookmarks action for left and right buttons which was placed in the text box. Picture 1:      Picture 2:                Step 6:          Update both bookmarks and will start work on that. Note:  Use CTRL before using bookmarks in power BI desktop. Thank you. 

How to install personal Gateway and configure with Data sets

Image
Description:       The primary purpose this blog will be helpful for how to download personal gateway and configure with data sets and also schedule refresh for Require data sets. Step 1:           Search in Google as “Download power bi gateway personal” and click on “Power BI Gateway Microsoft Power BI “. Step 2: Click on “DOWNLOAD GATEWAY “ Step 3:         After Download goes to desktop downloads and finds the Gateway setup. Step 4:         Double click on setup then on-premises data gateway installer window will be opened and click on NEXT button. Step 5:              Choose the type of gateway you need and click on next button. Step 6:          Gateway is ready to install.  Step 7:         Need to accept terms and conditions for installation and click on install. Step 8:        Installation almost completed, enter your valid email address, we need to s